pages

Showing posts with label homemade. Show all posts

Friday, February 24, 2012

Learning how to patchwork...

From the City...
I finally finished this patchwork quilt thing that I've been working on.  I say quilt thing because it's really just a quilted blanket cover.  See my granny gets each of her grandkids a heavy duty handmade wool blanket from MacAusland's Woolen Mills in PEI, whenever we hit a certain milestone, ie having our first baby, a big graduation, marriage etc.  Ours came as a wedding gift and it's amazing; super warm, rich bright red, incredibly beautiful, we love it.  The problem is that we also have a little shedding dog that also loves rich, warm, red, incredibly beautiful wool blankets. So I decided to cover it so she can continue to love it and we can try to keep it in good shape so that, maybe someday, we can pass it along to our kids.   
The blanket was about the size of a queen so using the old internet, I determined I needed 140 eight inch squares.  The fabric I used was actually old vintage sheets I found at thrift shops.  My goal was to not purchase anything for this project (which I succeeded at!).  I tried to have the same amount of squares per different fabric (5 in total) but that just didn't happen due to a lack of fabric in some.
    Impossible to quilt with this guy.  As soon as he found out that you can push down on the sewing machine pedal it was officially game over for quilting when babe is awake.  
Stitch the squares together, good side against good side.  
Iron down all seams, also known as, the worst job of all time.  
Completed strips.  10 squares in each row, 14 rows in total.
Lay out strips, making sure that no two same fabrics match up.  Much harder than you'd think!    Once we were happy with the arrangement we then numbered them in the top corner of the quilt block and then sewed and sewed and sewed until the whole thing was together in one piece.
(Look how happy Simon is to be helping!)
Like so.  
This is case in point why I am a horrible seamstress.  On the left you have a four nicely matched up blocks and in the section on the right, er, um, not so much.  
Yet another project where measuring is key.  Crap. 
I found this beige Ikea sheet at the Goodwill for 2.50 (hooray for 50% off day).  I sewed both giant pieces together, a feat in itself, making sure to leave about a foot and a half open on the side where I could get the blanket in.  
I made four ties and stitched those in making sure to line them up so you can tie the two together.  
Fini.    
-amelia

Friday, June 18, 2010

Chocolate Cupcakes er... Muffins...er Cupcake..oh whatever..

From the City...
It's officially my last day of work today and I decided to make up some cupcakes for the kids as a special treat. They contain no hidden fruit, vegetables or whole wheat flour (an organic, unbleached all purpose instead) which should make all the kids quite happy.

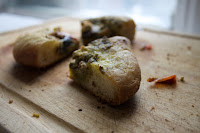
The cupcakes are really more like a muffin and definitely don't need icing if you don't want to make/ buy any. They stand up quite well on their own thanks to the butter and chocolate chips inside.

Chocolate Muffin-cakes:
2 eggs
1 cup (220 g) sugar
1 cup (110 g) all-purpose flour
6 tablespoons unsweetened cocoa powder
2 teaspoons baking powder
1 teaspoon vanilla essence
2/3 cup (160 ml) milk
2/3 cup (150 g) butter
4 oz (120 g) semisweet chocolate chips (optional)

Directions:
1. Preheat oven to 350 degrees.
2. Line your muffin pan
3. Beat the eggs with the sugar like so:
4. Mix in flour, cocoa powder, baking powder, vanilla and milk, like so:

5. Add chocolate chips, if you've decided to use them.
6. Bake for 20 minutes or until a toothpick inserted comes out clean.

I guarantee if you make them this weekend, a lot of people will want to be friends with you. Now what's better than friends AND cupcakes???

Sunday, May 9, 2010

Queen of the Potluck


From the City...

I'm a big fan of Mollie Katzen. She has a ton of cookbooks but I use her Moosewood Cookbook as pretty much my kitchen bible, just don't tell my Joy of Cooking. I lean towards it in the summer when there is more fresh veggies than you know what to do with and even in the winter when you're freezer is stocked with frozen blocks of harvest waiting to be turned into a soup or casserole.

When I was at my local vegetable market this morning I noticed that there was a pretty good assortment of ontario grown veggies, hot house tomatoes and some herbs that would nicely fill out the vegetable component of the salad. The great thing about the recipe is that it's pretty adaptable based on what's in season. I omitted the cucumber and instead chose to sneak in a bright (not local) red pepper, I cheated, just a little but yes I cheated. I also totally pillaged my new herb garden by snipping off the baby shoots of dill, mint and like three tiny sprouts of oregano.

This recipe is the best for potluck's. You serve it cold, it tastes better when left for hours, days even and looks so pretty and colorful in the bowl. The recipe also calls for dry lentils and dry bulgur wheat but I prefer quinoa for the following reasons:

  • It tastes amazing
  • A relative of the green vegetables like spinach and swiss chard
  • Not only high in protein but also considered a complete protein meaning that it includes all nine essential amino acids
  • I have a huge bag of it that Simon's mom bought me for christmas last year
Here's the recipe, make it and totally rule your next potluck. By rule I mean graciously accept everyone's compliments and requests for the recipe while stating that it was something you just came up with with the leftover contents of your fridge.

Cooked bulgur (cooled) Follow the directions on the package.
1/4 cup olive oil
1/4 cup lemon juice
3 cloves garlic, minced
1 tsp salt
1/2 tsp oregano
2 tbsp freshly minced mint
2-3 tbsp minced dill
3 tbsp parsely, minced
fresh black pepper to taste
1/3 cup minced red onion
1 small bell pepper (any colour) diced
1/2 cup crumbled ontario feta
1 medium ontario greenhouse tomato, diced
1/2 cup chopped toasted walnuts, optional

*note: I use all of the herb measurements very loosely, I never ever measure herbs. I start with a little and gradually add until I have found the perfect taste.

Add everything to the cooked/cooled bulgur except the tomato chunks and walnuts. Mix gently but thoroughly. Cover and refrigerate.

Before serving, add tomatoes and walnuts.

Wednesday, April 21, 2010

Freezer Burritos

From the City...

So as I've mentioned earlier, I looooove my freezer. I'm constantly thinking about different meals I can freeze and I'm not gonna lie, sometimes after I've filled the freezer with a new batch of something, I'll walk all the way to the kitchen (we have a really long and narrow apartment) and peek inside just to get a glimpse of the uniform rows of casserole dishes, the perfectly formed burritos tucked away neatly in their foil covers, or even on the days that I'm feeling overly ambitious, the ice cube trays of frozen herbs awaiting their trip into my meals.

I know, I'm a dork. I know this freezer obsession seems like a totally geeky thing to do on a Friday night but as I get older i've started to embrace these little quirky amelia-isms, Plus, all joking aside, I'm cheap. I hate wasting money and I hate wasting food. Simon on the other hand, loves to spend money on food (restaurant food, that boy doesn't cook) so our compromise for saving money relies heavily on having a stocked freezer that can sustain our little family.

One of our all time favorites is freezer burritos. They are so straight forward and easy to make and paired with say a salad or some home made fries, can equal out to be a pretty fulfilling dinner.

The Goods:

12 whole wheat tortillas
2 avocados (mashed up with a little olive oil , aka guacamole) I believe fully in eating locally and seasonally as long as I never EVER have to give up avocados, they make my life better and I would never take that away from anyone.
1/2 brick mozzarella cheese, shredded
1 jar good salsa, we have to make/buy mild because Simon is a wimp
2 lbs ground beef (last year as a x-mas present to ourselves, Simon and I bought 1/4 of a grass fed organic cow from our fellow Keg farmers and haven't looked back since. It is hands down the most economical way to buy organic meat and it's nice to know exactly where our meat is coming from, that it was raised in the most humane way possible and that we're paying a fair price for it) If you are a veggie (good on ya), go ahead and substitute some black beans for the beef.
1 shredded zucchini (Last summer we froze about 30 shredded zucchini's in little 1 lb individual plastic bags for pastas, breads, muffins and of course burritos)
1 shredded carrots
1 onion, chopped
2 cloves garlic, minced
1 cup brown rice, cooked

Saute onions and garlic in a little olive oil until soft. Add beef and brown all the way through. Add carrots, zucchini and rice and salt if you desire.


Now the fun part, well the fun part for me I guess. Lay out a tortilla, add a scoop of meat, a little cheese, a scoop of guacamole and some salsa, fold 'em up and wrap 'em in tinfoil. Repeat, repeat, repeat until you close your eyes and see little burritos on the inside of your lids.

The finished product or as we like to call them around here, little bars of meaty gold ( or as close as we'll get to gold anyway).

Make 'em and enjoy 'em.

See ya!

Thursday, April 8, 2010

Hi there heaven, it's me, Amelia...

From the City...

Oh man, Oh man, Oh man.

I'm going to give you the best recipe for coconut cupcakes ever, I suggest you make them. I also suggest that you have someone to give them to or a large group of people coming over to eat them because they are simply lovely and impossible to ignore.

I came across this recipe when I was researching for our monthly community dinner at the school where I work. Once a month, the entire community is invited to a dinner put on by my junior chef club as well as some form of workshop relevant to the communities needs (think, parenting teens, programs offered at the Library, healthy eating etc etc). Anyway, the kids are always trying to get me to make super sugary rich desserts that don't contain any fruits or vegetables, which I put in everything (think, zucchini muffins, banana bread, oatmeal apple cookies etc etc). So the community dinners act as our compromise, I create my desserts for the whole month except for that one night when I let them go wild.

Here's the recipe, give it a whirl.
  • 1 3/4 cups all-purpose flour
  • 2 teaspoons baking powder
  • 1/2 teaspoon salt
  • 1/2 cup packed sweetened shredded coconut
  • 6 ounces (1 1/2 sticks) unsalted butter, softened
  • 1 1/3 cups sugar
  • 2 large eggs plus 2 large egg whites
  • 3/4 cup unsweetened cococonut milk
  • 1 1/2 teaspoons pure vanilla extract
  • 1 1/3 cups large-flake unsweetened coconut
    1. Preheat oven to 350 degrees. Line muffin tins with paper liners. Whisk dry ingredients, including shredded coconut, in a large bowl. Cream butter and sugar with a mixer until light and fluffy. Add eggs, 1 at a time, beating after each addition.
    2. Reduce speed to low. Mix any remaining wet ingredients, including coconut milk and vanilla extract in a bowl. Add dry ingredients to butter mixture in 3 additions, alternating with wet ingredients and ending with dry. Scrape sides of bowl. Divide batter among muffin cups, filling each 2/3 full.
    3. Bake cupcakes until testers inserted into centers come out clean, about 20 minutes. Let cool in tins on wire racks.
...now you can either leave them just like so and enjoy a lighter treat or you can not be crazy and make this incredible coconut cream cheese icing.

Ingredients:
  • 1 (8 ounce) package cream cheese, softened
  • 1/2 cup butter, softened
  • 4 cups confectioners' sugar
  • 2 tablespoons coconut milk
  • 1/2 teaspoon coconut flavoring
  • 1 teaspoon vanilla extract
  • 1/2 cup sweetened shredded coconut

Directions

Beat the cream cheese and butter in a mixer bowl until light and fluffy. Gradually add the confectioners' sugar, one cup at a time, alternating with coconut milk. Beat in the coconut flavoring, and vanilla extract. Continue beating until mixture is smooth and spreadable. Add additional confectioners' sugar if necessary to thicken the frosting, or more cream to thin. Stir in the coconut. If desired, spoon toasted coconut evenly over frosted cake.

Saturday, March 20, 2010

This is what you wake up to at the farm...

From the City: in the country

So I went to the farm for a couple of days to get out of the bustle and noise of the city and spent my days cooking, eating and taking pictures. My three favorite things combined.

Mark made these incredible Blueberry Bran muffins for breakfast one morning and I couldn't not take pictures and blog the recipe. So here it is, make 'em and enjoy 'em.

Extra-Easy, Extra Moist Bran Muffins
  • 1/3 cup vegetable oil
  • 1 large egg
  • 4 tbsp dark brown sugar
  • 1/3 cup molasses
  • 1 1/2 cup unbleached white flour
  • 1 cup wheat bran
  • 1 tsp baking soda, baking powder, ground cinnamon
  • 1/2 tsp sea salt
  • 3/4 cup plain yogurt
  • 1/2 cup milk
  • 1 cup blueberries (raisins, cranberries etc etc)
Preheat oven to 375. Grease muffin tins thoroughly and set aside.

In a large bowl, combine first four ingredients.

In a medium sized bowl, sift together the dry ingredients, adding the blueberries if desired.

In a cup or small bowl, combine the yogurt and milk.

Add dry ingredients alternately with the yogurt/milk to the first ingredients, stirring JUST to combine, don't overmix! (Overmixing kills good muffins and they don't deserve that)

Pour into prepared muffin pans.

Bake 15-20 min until done.

Enjoy with butter, jam, jelly, honey or just on their own .

Saturday, February 27, 2010

Sunday Deliciousness

From the City:
Simon loves pancakes, like loves pancakes. Whenever we go out for breakfast, he always orders a standard breakfast (eggs, bacon, toast) with a side of pancakes. For him, this is the perfect combination of sweet, salt and fat.

So in order for our relationship to be long lasting (7 years this September) certain things had to be mastered:
  • I had to learn the art of tickies. This is a family term for tickling the head, arms or back and occurs mainly in the evenings
  • Learn the art of multi- tasking by watching a movie while also working on a laptop and carrying on conversation
  • Make a mean stack of blueberry pancakes

Here are some tips to making perfect pancakes:

1. Before you ladle on the pancake batter, wipe access butter off the griddle with a folded paper towel. This will make sure you have perfectly browned pancakes.

2. Use all purpose flour in the batter. Cake flour can turn soggy when you top it with syrup. Experiment with different flours like buckwheat or whole wheat just substitute half of the all purpose for any of these.

3. Never whisk batter until it's smooth. Lumps are a good thing and will result in fluffier pancakes.

4. Flip pancakes just as the surface bubbles begin to burst. Flipping them after makes for flatter pancakes.

5. When adding blueberries, bananas or chocolate chips (only some of the many additions you can make) sprinkle them over the batter right after they have been poured on the griddle. This will make sure they are distributed evenly and it also makes them look prettier on the plate, which can sometimes be just as important as how they taste.

6. Warm pure maple syrup before serving. It makes for a certain extra little bit of specialness to the morning (or evening, whatever, no judgement here)

Here's a good (basic) recipe that should keep 'em coming for more:
  • 1 cup all-purpose flour (spooned and leveled)
  • 2 tablespoons sugar
  • 2 teaspoons baking powder
  • 1/2 teaspoon salt
  • 1 cup milk
  • 2 tablespoons unsalted butter, melted, or vegetable oil
  • 1 large egg
  • 1 tablespoon vegetable oil
  • Assorted toppings, such as butter, maple syrup, confectioners' sugar, honey, jams, preserves, sweetened whipped cream, or chocolate syrup
  • Directions
  1. Preheat oven to 200 degrees; have a baking sheet or heatproof platter ready to keep cooked pancakes warm in the oven. In a small bowl, whisk together flour, sugar, baking powder, and salt; set aside.
  2. In a medium bowl, whisk together milk, butter (or oil), and egg. Add dry ingredients to milk mixture; whisk until just moistened (do not overmix; a few small lumps are fine).
  3. Heat a large skillet (nonstick or cast-iron) or griddle over medium. Fold a sheet of paper towel in half, and moisten with oil; carefully rub skillet with oiled paper towel.
  4. For each pancake, spoon 2 to 3 tablespoons of batter onto skillet, using the back of the spoon to spread batter into a round (you should be able to fit 2 to 3 in a large skillet).
  5. Cook until surface of pancakes have some bubbles and a few have burst, 1 to 2 minutes. Flip carefully with a thin spatula, and cook until browned on the underside, 1 to 2 minutes more. Transfer to a baking sheet or platter; cover loosely with aluminum foil, and keep warm in oven. Continue with more oil and remaining batter. (You'll have 12 to 15 pancakes.) Serve warm, with desired toppings.
Side note:
These are some pics from the summer when Laura and I took the kids and went blueberry picking. It's a great, really economical way to stock your freezer with juicy berries for the long winter months.

Have a nice Sunday everyone!


Monday, February 22, 2010

Potluck Engagement Party

From the City

On Friday night we hosted an engagement party for some good friends of ours and in true Amelia fashion, I made it a potluck. I've often thought that when Simon and I make the trip down the forever aisle, we'll make it potluck. Mainly so I can have my sisters famous bread combined with Simon's Aunt's lasagna, anything my brother and law has ever made all capped off by one of my cousin Anna's weird and wonderful trifles, it is the wonderful combination of so many people's hard work, all piled up on your plate, that I really really love.

Here are some more reasons why I love potlucks:
  • it forces people to think about food and be creative
  • it is the perfect conversation starter for a group of strangers
  • the surprise of what will be on the menu
  • it gives socially awkward people something to do as opposed to making actual conversation with people (I am one of these people)
  • for me, potluck's are all about picking away and eating slowly, which I love. There seems to be no rush and people can leisurely take their time eating and savoring.
  • Food is a community event and potlucks are the ultimate symbol of this, it is traditionally the bringing together of harvests from different areas or in our case bringing together different people's strengths. Like for example, I would never bring a stir fry to a potluck because I may possibly make the worst stir fry on the face of the planet, but a blueberry pie, I would definitely bring a blueberry pie to a potluck. You get what I'm saying here right?
  • It is a great way to distribute the cost of the sometimes daunting food budget that usually accompanies a party
So back to our potluck. We had a cheese board, two different types of hummus, pear and brie flatbreads, olives and a couple of bottles of red wine to wash it all down.

I made pizza cause I really like pizza, like, a lot. I might even go as far and say that I'm a bit of a connoisseur. You name it, the crust, the cheese, the toppings, all very integral to the creation of the perfect, delicious, mouthwatering pizza.

For my potluck pizza, I roasted a whack of vegetables; peppers, cauliflower, mushrooms and zucchini. I picked up some goat cheese and artichokes and made my favorite super easy pizza dough. I make this recipe with the kids at work all the time and it works out every time. You can also make a lot of substituting to it in terms of the flour you use.

Here's the recipe, make it for your next potluck.
Dough
1/2 cup light cider or lukewarm water
3/4 cup lukewarm water
1 1-1/2 tsp instant yeast
1 tbsp honey or sugar
2-3/4 cups all-purpose flour
1 tsp salt
2 tsp olive oil

Directions:

In a bowl, combine the cider, water, yeast and honey. Let stand until frothy, about 5 minutes.
In a different bowl, mix the flour, salt and oil. Stir with a wooden spoon. Add the yeast mixture and mix until a soft ball is obtained. Remove the dough from the bowl and knead a few minutes while flouring to avoid sticking.

Place the dough into a lightly oiled bowl and cover with a clean cloth. Let the dough rise for about 1 hour in a lukewarm area, away from drafts.
Using your hands divide the pizza dough into two equal parts.
Use the dough immediately or lightly oil before storing in a plastic bag. It can be refrigerated up to 12 hours or frozen.

Note: To activate yeast, the temperature of the cider and of all other liquids is important. The temperature must be between 41 and 46?C (105 and 115?F), which means that the cider must be heated a little. The liquids should not be too hot as this will kill the yeast and not too cold, as the dough will not rise.

Lightly oil a baking sheet with olive oil and a dusting of cornmeal. Roll out dough and drizzle a little olive oil and sprinkle of cornmeal

Saturday, February 20, 2010

Maybe Someday...

From the country...

Yesterday I brought all my soap making equipment up from the basement, washed it off and put it to use. I used to make soap often in the winter for sale in the spring/summer but that hobby has been replaced with being a farmer Momma. For now, I make soap for gifts, to fill orders, and for our home. My children have never used anything other than my homemade soap and my friends/ family swear by it (not to blow my own horn or anything…)

I use the cold process method with premium quality olive, coconut, palm and sweet almond oils. It is a basic recipe I learned about 10 years ago when I lived in Vancouver. If anyone is interested in the recipe, just send me an email. I have adapted this recipe to make many different types using essential oils, honey, dried flowers and botanicals (which grow here in the summer) and the combinations are endless. Some of my favourites soap recipes are: wheat germ, oats and honey, rosemary sunflower, lavender, and peppermint cocoa.

I can’t imagine life without homemade soap. It is one of those luxuries that people pay big bucks for but I can make it for less. I love when I can take something that is considered expensive (soap, crusty bread, cake etc..) and make it myself. There are so many things I would like to learn too. I would love to whip up and set of dishes with a pottery wheel or sew curtains for the windows. I am not there yet, maybe someday.


Today, I will make soap.


Pin It "> Related Posts with Thumbnails Pin It